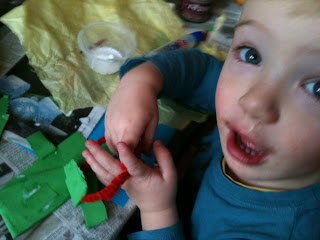
Boy, have we had a crafty day today! This morning I had volunteered to lead a one hour Christmas craft workshop at the French play group that Ju and Lilo have started attending recently. This involved showing seven children aged between 18 months and 8 years old (as well as their parents and the teenage co-host) how to make a selection of Christmas ornaments.
As the age range was so wide, I chose to go for five different activities:
-
Card collage, using snowflake motif hole punchers and various colours of cards and marker pens - perfect for making cards, present tags, table place markers...
 |
| Card collage and cut out |
-
Pipe cleaner ornaments - very simple tree decoration
 |
| Heart-shaped pipe cleaner ornament |
-
Coloured light tree ornament - made by punching out snowflake shapes in a tree shaped card, then glueing coloured tissue paper behind - a lovely decoration for a window
 |
| Really pretty snowflake shapes shining through with vibrant colours |
-
Stained glass effect window decoration using recycled transparent tub lids and Sharpie markers
 |
| Stained glass effect ornaments make the most of the winter light |
-
Little angels made from card, cotton wool and nylon tights - instructions for these are from Red Ted Art and
can be found here
 |
| Cute little angel |
Everybody tucked in to the activities, adults and older children tending go for the last two activity types (but not exclusively) and the younger children for the first two. For one hour, there was a whole lot of crafting going on at my friend's house, who was kindly hosting this workshop.
 |
| The children are very focused and creative |
Most children had made at least two finished products by the end of the workshop.
 |
| Angels and a card collage and drawing |
Ju made a 3D collage using green card paper he cut with his crinkly scissors and glue; he also made a pipe cleaner ornament for the tree, in the shape of an apple. Lilo mostly enjoyed climbing everywhere, watching my friend's goldfish swim and hugging giant teddy bears.
This afternoon, back at home, we made stained glass window honey cookies. This involves making cookies with the centre cut out, which is then filled with crushed boiled sweets.
 |
| Star shaped cookie with the centre cut out |
 |
| Ju cuts a heart shaped cookie |
 |
| Lilo enjoys sorting the boiled sweets into different colours |
 |
| Cookies with the crushed boiled sweets, ready for their final baking to melt the centre |
The crushed sweets melt in the final 4 minutes of cooking time, creating a stained glass window effect, which is very Christmassy indeed. These cookies would make fine ornaments as well, but we chose to make them to eat tomorrow with our friends as we are having a special Christmas gathering at home.
 |
| Stained glass window effect cookies all ready |
However, as the honey cookie recipe was - to say the least - a bit of a nightmare (it didn't hold its shape during baking, possibly because the dough need refrigerating before baking), I won't give you a link to the recipe. If you want to re-create these, I would suggest using your best sugar cookie recipe, i.e. one that holds its shape. I had to rescue mine by re-cutting them with cookie cutters when they were almost cooked, before putting the crushed up boiled sweets to make the stained glass "window". I could really have done without the hassle. Still, they ended up very pretty and impressive as well.
On top of all this, I also made a
white chocolate and cranberries panettone.
 |
| White chocolate and cranberries panettone |
And as if I hadn't been busy enough, I also made these super cute Rudolph cupcakes using this
recipe for chocolate cupcakes and my own design for Rudolph's head: brown and red fondant icing for the face and nose, cut-up mini marshmallows and black gel food colour for eyes, and plain chocolate antlers I piped on a silicone sheet using a cut-up plastic freezer bag and then left to set. I think the boys are going to LOVE those.
 |
| Guess who? |
Kitchen still needs a good tidy, so I'm off to do that now!


No comments:
Post a Comment